If you want to experiment Linux, learn this thing you never had before then you must try to install Linux first on virtual box rather then installing on your Hard disk permanently. On doing experiment Linux may crash, to prevent this you can install Linux on Virtual Machine. After crashing you can install again and do your process again. That was the most good things for Virtual Machine. You don’t need to make partition or back up data as you need in hard disk installation.
Installing Ubuntu Linux on Virtual Box is not a hard thing but an easy task, any one can do that. But before doing this thing, I will let you know what is Virtual box, its requirement and how it works.
What is Virtual Box?
Virtual Box is like a Virtual Machine that help you to install any operating system as an application on your another hard disk installed operating system(window) without doing any hard disk changes. It can install any operating system as virtually, you can modified it many times. You can install many OS in your primary OS with the help of Virtual Box but you need more memory space.
In Virtual Machines, there are mainly two software are famous: Virtual Box and VM-Ware. Virtual Box is free but VM-ware will cost you some money.
Requirements
You need only two things before installation.
1. Virtual Box, you can download here: Download Virtual Box
2. An Ubuntu ISO image, you can download here: Download Ubnuntu
Install Ubuntu on Virtual Box
To install Kali Linux on Virtual Box you need to follow two steps.
- Create a new Virtual Machine.
- Installation procedure of Ubuntu on virtual Machine.
Create a new Virtual Machine
Step 1. Download Virtual Box as your current OS type (Window, Linux, or Mac) and install it. After opening the app, it will look like..
 Click the ” New ” button in Virtual Box to create new virtual machine. New window will pop up.
Step 2. Type the name of OS you want to install, I typed Ubuntu 12.04. Select the OS type and version. I selected Linux and Ubuntu .And click ” Next “.
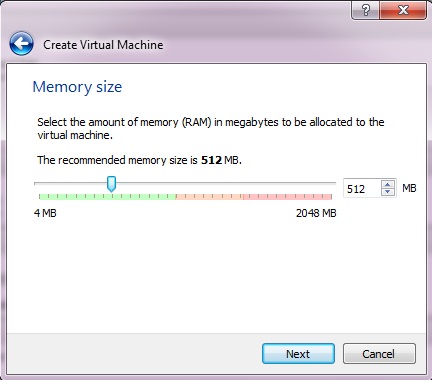
Step 3. Choose memory size, by default it will show you recommended memory to install. Make it double or triple as you want more smoothness in virtual OS. And click ” Next “.
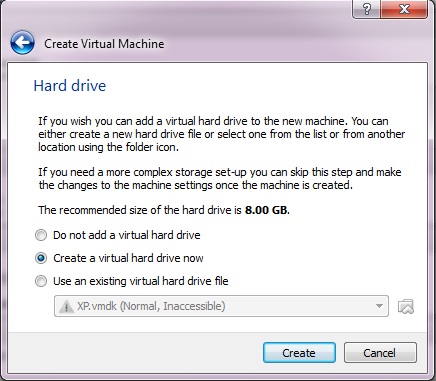
 Step 4. In create virtual machine window, select option “ Create a virtual hard drive now ” and click ” Next “.
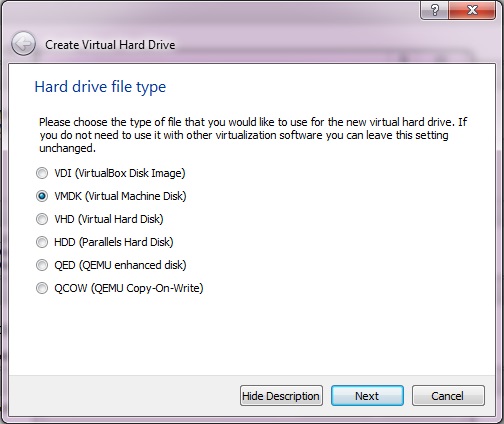
 Step 5. In create virtual hard drive window, if you want to use same image with another virtual machine in future then select ” VMDK (Virtual Machine Disk) “. Else you can select ” VDI (VirtualBox Disk Image) ” and click” Next “.
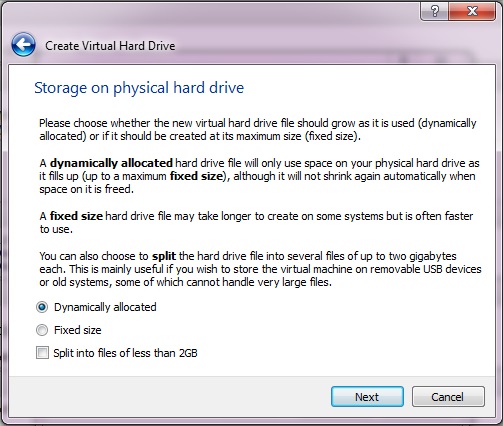
 Step 6. In storage on physical hard drive window , you will have to choose storage type. Select ” Dynamically allocated ” if you want more space in future (it will dynamically adjust) or else you select ” Fixed size “. In my opinion, please select first option because it is more safe. And then select ” Next “.
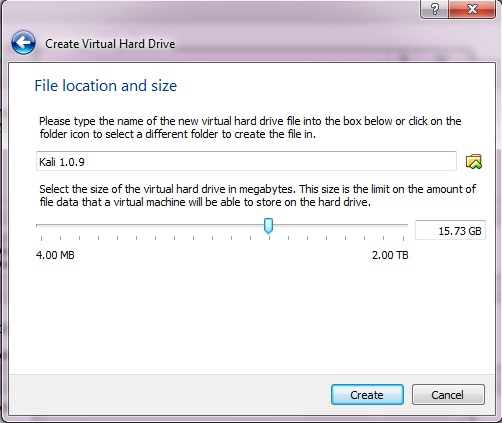
 Step 7. In file location and size window, first select location where you want to keep your virtual OS by clicking green arrow button. Second select you storage space of virtual OS, choose minimum 15 GB . And then click ” Create “.
Now your virtual machine is created.
Step 8. Go on home screen select your virtual machine and click ” Start “. New window will open and select your ISO image of Ubuntu and then click ” Start “.
Now your Linux is booting, take appropriate steps as per your Linux installation.
Installation Procedure
Installation steps are different as Linux are different to each other. But for a particular Linux it will always the same as you install on hard disk permanently.
Step 1. After booting started you will on this page, look like..
Select ‘ try ubuntu without installing ‘.
Step 2. After step 1 you will get live Ubuntu running. You will start the installation by double clicking on desktop icon ‘ Install Ubuntu ‘.
Step 3. Next window will ask you to select your language, choose language you would like to use and click ‘ continue ‘.
Step 4. Next window will ask you to connect to the Internet while installing Ubuntu. Personally I will suggest you to click ‘ I don’t want to connect to Internet ‘. There is a good reason for that. You can update your Ubuntu later.
Step 5. Next window will show how you prepared to install Ubuntu. Ignore this window click ‘ Continue ‘ it doesn’t matter because we are going right way.
Step 6. Next will show you Installation type window, there are mainly four options…
 Since this is a VM with an empty virtual hard drive it’s perfectly fine (and I recommend) that you click Erase disk and install Ubuntu. This won’t erase the hard drive of your Host OS (Ex: Windows 7) only the disk of the Virtual Hard Drive gets annihilated. There’s nothing on the virtual disk because we just created.
Leave the other options as is and choose Install Now.
Step 7. Installation has begun but it will ask few more steps for configuration. It will ask you to select ‘ location ‘, choose your location.
Step 10. Next window will ask you to choose your ‘ Keyboard layout ‘ and then click ‘ continue ‘ after choosing your keyboard layout.
Step 11. Next window is ‘ who are you ‘ asking your name , PC name and account password. Fill the blank and proceed with selecting ‘ continue ‘.
Step 12. Final step, a progressing window showing your installation progress . As the bar is completed your Ubuntu installation is finish.
It will take few minutes to complete. After finished it will ask you to reboot or remain in live version of Ubuntu, click ‘ Reboot ‘.
Now Ubuntu is installed in your Virtual Machine, Good luck! If you still face an issue to install then feed your comment right below to let me know and I will help you..

